Friday, 29 March 2019

Memory Verse Psalm 46 v 1 - Training & Visual


Great verse to learn along with the Stories about the young Joseph.

You know the story of the Coat & The Dreams and  the story about Joseph being Sold by His Brothers.

This verse teaches us just what a strong, protective God we have who is present with us at all times and is the one we can always trust in.


VISUAL OF THE VERSE

When we do this with the kids I like to make the words large because it is a kind of shout out verse to proclaim what we believe about our God.

So I print it out on seven A4 cards and cut each one in half.


PRESENTING THE VERSE

Get the kids to help by holding up a card in each hand.
So because you will have 14 cards when cut you will need 7 children.

Each child is only allowed to hold up 2 cards if they can immediately learn off the two words they are going to hold.

Have the 7 kids stand in a row in the right order for the words of the verse.


TEACHING THE VERSE

Tell the children you are going to shout out one of the words and the person who is holding it must hold it up high to prove they know the words they have.

Shout out the word REFUGE and the child with that word holds it up high while you explain briefly what it means.

Do the same with any other words you feel they may not fully understand like PRESENT which they may be getting mixed up with GIFT.

Then read out each word slowly in order and have the 7 children hold them up high in the air and keep them there.

Then tell them to hold all the cards up high for the rest of the time they are learning the verse.


LEARNING THE VERSE

Everyone says the words of the verse together about 5 times.

Then each of the children with cards put one of their hands down so that only half of the wrods are now seen.

Everyone says all the words of the verse together about 5 times again.

The kids without cards will learn by looking at all of the cards.

The kids with cards will know their own words and will learn the other words by listening to the other kids beside them.

This means you can make a little competition of learning the verse by saying that you have two teams those with cards and those without cards and the winning team will be the one that has most people who know the verse at the end of the class.

Will the readers or the listeners be the best?


MAKING THE VISUAL OF THE VERSE

This is so simple to do that if you have a computer and a printer you can design and do this yourself using whatever fancy font you like.

If you would rather not have to design it then you can download a Pdf of mine and print it out.

Just sign up here and I will send you the link you need.


Posted on by Sandra @ Sandra's Ark | No comments

Friday, 22 March 2019

Kids Heart Banner "Jesus Loves Me" - Easy tutorial


A Heart Banner for the PreSchool Age Sunday School Class.


Basically something simple & quick to make and does not need too many materials.

 "Jesus Loves Me" banner.


I first made this as a Valentine Heart Banner


MATERIALS REQUIRED

Computer
Printer
White A4 card
Remnants of Ribbon
Staples/Glue
Scissors


STAGE 1

Firstly you need to download the FREE PRINTABLE

It consists of pictures of hearts with letters inside them.

Some of the letters are repeated in the phrase so you do not have have every single letter simply print some off twice.


STAGE 2

This depends on how large you actually want your letters to be.

I felt for the smaller room that it would be big enough to have each heart less than the size of an A6 card so that meant that I could have 5 to each A4 card


Then I used Powerpoint to set out the letters I needed on an A4 sized slide and printed out all the letters involved including 3 blank hearts - never waste space and they can always be used later if not needed now.


STAGE 3

The cutting out was the most tedious part but I normally do that while I'm watching something on TV so not so bad and of course never waste time.


STAGE 4

I hunted through all my remnants of ribbon to see if I would have enough pieces to put together to form a long ribbon to which I could attach all the hearts

Thank goodness I have a long kitchen table.


STAGE 5

Then I chose the thicker longer ribbon but I could have used the thinner off white ribbon pieces and glued them together to make it long enough.

There were 3 reasons for choosing the thicker ribbon
1.  long enough without having to piece lengths together
2.  thick enough to not have to be so precise with the glue
3.  it was actually decorated with little hearts too

So I placed all the letters carefully alongside to get the right spacing before pressing each letter against the glue dots on the roll of dots.


Each heart got some glue in two places (the tops of the curves)


Before I pressed them all unto the ribbon.

As you can see I used glue dots because they make this type of thing so easy, neater & much quicker than using my glue gun.


If you would like to try out this Easy Banner Craft then you can download a pdf of the hearts for the Preschool size shown above by clicking on  Easy Heart Banner (Small)

And if you would like to make a larger one for an older group then you can download the pictures by clicking on  Easy Heart Banner Pics (Any Size)

Don't forget to let me know if you try it out.


Posted on by Sandra @ Sandra's Ark | No comments

Friday, 15 March 2019

Kids Song Visual for "Whisper a Prayer" - Easy Tutorial


An Easy Tutorial for making a Visual for the 

Kids Song 

"Whisper a Prayer" 


Materials Required

2 large pieces of cardstock  (I chose blue but other colours would be ok)
something to draw out a circle
scissors
split pin
picture of sun rising  (to represent morning)
picture of full sun in sky  (to represent noon)
picture of moon at night  (to represent evening)
picture or stickers of music notes
cardboard lettering or stickers for letters
  (if you do not have a heart or letters then you can draw these on instead)


Method


1.  Cut out two circles of diameter approximately 11 inches / 28 cms from your card.

2,  Mark the centre points and make a small hole in each one with the point of your scissors or compass.


3.  Cut out a sector from one of the cards but do not go right into the centre hole stop at least half a cm from it.


4.  Stick your pictures representing the three times of the day around the outer part of the full circle making sure to work out distances between them so that only one picture will be seen through the open sector at any one time.


5.  Now it is time to stick on your letters or write them on making sure that you place them in a straight line to form the words and do not actually stick until you are happy with your placement.
Do not worry if some of the glue seeps out because if you use clear glue the kids will not notice.


6.  Now place and stick on your heat or draw it in red.
     My wooden red heart already shows a bit of wear but that is not noticeable from a distance.


7.  Time for placing and sticking on your music notes or drawing them.
     The contrast of the colours of the letters, notes and heart on the blue background make these things stand out well.


8.  Your front circle should look something similar to this now and hopefully you do not have 2 holes in the centre instead of one like I did.  I simply was too impatient to measure properly but when the split pin is in place that won't even be noticed.


9.  Place the front circle on top of the back circle (with the pictures all facing forward and push through the split pin from front to back. Then open the prongs and secure the two cards together but not too tightly as you want the circles to be able to move freely but also not too loosely so that the back will swing round by itself.


10.  As you turn the back circle the morning picture will disappear and then the noon picture will show in the open sector.


11.  As you continue to turn the back circle the noon picture will disappear and the evening picture will appear.


12.  Now all you have to do is find somewhere to store your Song Visual while not in use to ensure that it will last you many years.  I actually had a large square clear plastic folder that some other product had come in and because it also had a little pocket in the front I slipped in a piece of card with the Key of the song written on it. (This is handy when I want my husband to play the guitar for the song and I can easily tell him what Key and he can accompany the children as they sing.

Posted on by Sandra @ Sandra's Ark | No comments

Friday, 8 March 2019

Magnetic Blackboard Chore Chart / Attendance Chart - Easy Tutorial


I have a very easy Tutorial to share with you today.

          
           It is a simple tutorial for making a

 Magnetic Blackboard Attendance Chart 

for your Sunday School class or a small Children's Church. 


Of course it could be made for several other things for your own kids at home eg.

Chores Chart
Reading Practice Chart
Homework Chart


It is quite easy to make and is designed to be reused 
or adapted later for other uses.


The Materials Required:

  • Ruler
  • Scissors
  • Coloured string or ribbon
  • Small round sticky backed magnets
  • Sticky backed magnetic strip (which I already had cut into pieces from an previous time)
  • Liquid Chalk Pen (or you can use ordinary chalk)
  • Blackboard paint (I had only about a fifth of this small tin left from a previous time and didn't even use all of that)
  • Paint brush
And 

      An old baking tray or cookie sheet.


As you can see the baking tray was scratched and stained but that would all be covered.


First make sure the baking tray is clean and then using quite a narrow drill piece bore two holes in the tray in what is to be the top two corners so that the tray will hang horizontally (so the two corners along one of the long sides)


Drilling the holes will leave rough edges on the back of the tray and you can clearly see what that is like here.

But there is a very simple solution for making them smooth again.


Simply get a wider drill bit and use that on the back of the tray.

So as well as taking a picture of this part I also took this short video while my husband was doing it.


It definitely makes a good difference to the edge of the holes and will not scratch anything it touches.


Next step is to get the old newspaper down on the table and start painting the tray with the blackboard paint.


Easy job.  
However it may dry quickly while you paint.


Paint the main section and the trim around the front but you need not bother to paint the back as it is not going to be seen.


Let it dry for a while and then put on the number of the small round magnets to represent the number of weeks you want to do attendance for to see about spacing.

You will be able to get up to 15 weeks in a medium sized tray like this one.


Then try the rectangular magnets to check the spacing down the left hand side for the names of the children as well..


When I removed the magnets it was obvious that I hadn't waited long enough to let it dry completely and small marks were left from the paint coming off.

This meant a second coat of paint and waiting long enough for this one to be completely dry before the next step.

So take my advice and make sure it is fully dried the first time.


Use the ruler and the liquid chalk pen to draw a line down leaving enough space for the length of the rectangular magnets at the left and write the heading of "NAME" 


Next write the heading of "ATTENDANCE"

Then thread the end of the coloured string through the hole at the left hand side from back through to the front and tie a double knot which will be thick enough not to pull back through the hole.


Measure & cut off enough of the string to be able to hang the board up and tie a knot at the other end and the board is complete.

Now for the names.


Use a labeller (I chose black lettering on a blue background for the boys and black lettering on a red background for the girls) to print out the names of the children.

OR

Use Small sticky labels and Carefully write the names of the children on them.

OR

Simply cut pieces of thin card and write the childrens' names on these

Strip off the paper from the sticky side of the magnet and stick the name on in its place on each magnet.


Trim off the edges of the magnets so that the names look nicer and then they are ready to be placed on the board.


The names can be spaced out nicely on the board and it will be ready to be hung up on the noticeboard or wall.   

Don't forget a small container of the small round magnets to be kept nearby for the children to put one up beside their name each day they attend.


This is my finished product on the notice board in our Sunday School Room at Church.


Posted on by Sandra @ Sandra's Ark | No comments

Friday, 1 March 2019

Ribbon Attendance Wall Hanging - Easy Tutorial

Here is a simple tutorial for making an

                      Attendance Wall Hanging 

for your Sunday School class or a small Children's Church,
which will cost very little to make.

It has been made so that it can be reusable by changing the simple decorating feature.


PREPARATION

If you are like me you will have various leftover crafting embellishments from other projects so you can hunt them out to help with this one.


I got a sheet of A3 coloured card.
Any colour will do.

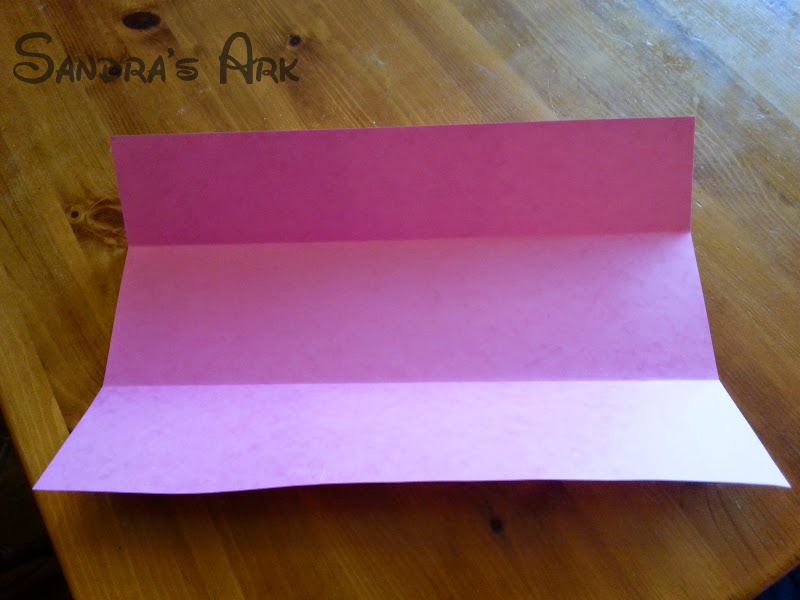
Then I folded it in 3 lengthwise but with one end section slightly narrower than the other two.

Next it was off to the computer


and I used a nice thick Alpha from my digital scrapbooking files to use for the font of the Header and this was printed on to a white A4 Card.

I made 3 because I only needed the header to be less than a third of the width of an A4 card and thought I wouldn't waste the rest of the card and I would have two headers for future use.


Next I looked through and found some shapes to use


Then I got out odd pieces of ribbon.


I didn't need all the pieces of ribbon to be the same colour as this would have made the Wall Hanging rather bland so I was happy to use my left over pieces which gave me a nice variety of colour.

I also needed two sided sticky tape because I didn't want to mess around with glue and the tape makes it all so much quicker to do.


The next stage was getting the pieces of ribbon long enough so I placed some ribbon down flat on the table and put the larger embellishments beside to measure how long to cut the ribbon.  I would probably have 12 children at the most in the class so it just needed to be long enough to hold 12 of those butterflies plus a little bit more to be stuck inside the card.


When the 15 pieces of ribbon were cut to the right length (15 because I was going to use it for attendance on 15 different weeks) I then had to make sure they were all ironed flat because ribbon likes to curl round when it is cut.

So now that everything was ready it was back to the card.


PRODUCTION


I folded the card over from one side towards the centre and then the narrower section over on top of that.

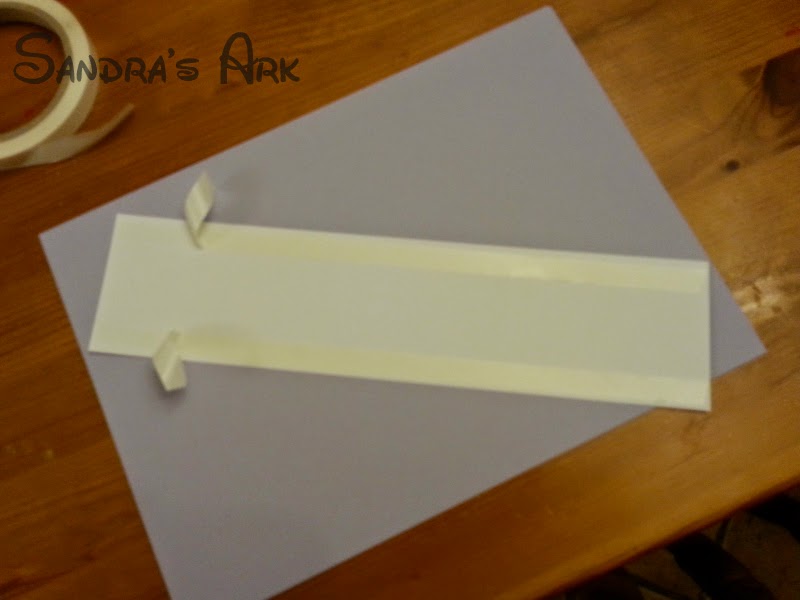
Then came the two sided tape


I cut a length of the tape just slightly shorter than the length of the card and pealed off one of the coatings and stuck this down on the card in far enough from the folded edge remembering that the last section to fold on top was slightly narrower.


Next I peeled off the other coating from the tape but did not stick down the last section of card because the ribbons had to be put in first.


There were 15 ribbons so I was able to start easily with placing one in the centre and pressing it down to have it stick to the card.
I had of course taken a little time when ironing the ribbons, to consider the colours I had and worked out the arrangement I wanted to place them in.


So I placed all the ribbons in the right order of colour on the table and spaced them out evenly before I stuck each one unto the tape.


Then I folded the card over and pressed it down firmly.
I did not need to put any more tape on the last part to fold over because there was enough of the tape between the ribbons for the card to stick well.


Using my card and paper cutter I cut the header sheet into 3 pieces and put two away carefully to keep for another time.


Using more two sided tape I cut two strips and placed them along the two long edges on the back of the Header.

I peeled off the coatings, carefully lined up the Header on the Front of the Card and stuck it down.


Next I took the butterfly cut outs that I planned to use for the first week and cut small pieces of two sided tape to put on the back of each one and then tiny 2.5cm long wooden pegs were stuck to the butterflies so that the children could clip them to the ribbons.
(I had enough pegs to do for about 4 weeks but since then I have bought more on Ebay and they only cost around £2.97 for 100 pegs inc P&P)

Each week we will have a different shape and have different colours in each of the shapes so that the children can pick which colour they want.


Before the children clip their shape to the ribbon they will write their name on the shape.
Then at the end we can count each of the names and see who has attended best and there will be a small prize for that person.

All of the children will then get to take all their shapes home with them - so they will all actually get something.

Now all that was needed was to stick two other butterflies to the Card to decorate it and the whole thing could simply be used again by carefully removing the two decorations and adding two different ones (perhaps balloons, or animal shapes).


Posted on by Sandra @ Sandra's Ark | No comments